Tips for getting started and choosing your equipment
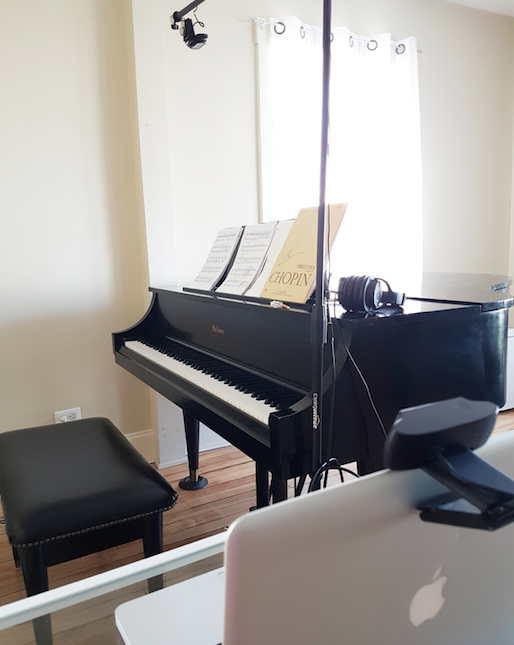
Whether you are switching to online lessons temporarily due to the COVID-19 outbreak, or because you would like to transition to online teaching, this set-up will allow you to connect with your student as if they are in the same room. This is definitely not the only way to set up your online studio, and you do not need to have all of this equipment to get started (especially if your online teaching is a temporary solution). I have received many questions about this set up, so I will share a list of all the equipment I chose and why it was helpful. I am using all of this equipment in addition to my Macbook Pro.
Webcam(s)
I chose to use the Logitech Pro HD C920 & C920S (they are pretty much the same except one has a privacy cover). I previously owned a Logitech c920 so I just added one, so I can have a camera angle above the piano. I was originally going to use only one webcam for the top view and my built-in Macbook Pro camera, but I realized how bad the Macbook Pro camera looked (it is very old, will need to be upgraded soon). My favourite part about the Logitech cameras is how they adjust to the lighting in the room very well (my built-in Macbook camera was dark and fuzzy in the evening despite lighting). Here is a link to the C920S, which is currently the most affordable Logitech on Amazon (and great quality!):
Microphone Stand + Attachment
I use the Amazon Basics Tripod Boom Microphone Stand with a mic stand attachment that can hold cameras/webcams. This was the only solution I could find that could hold the webcam high enough to see all the piano keys, but also be stable enough to not shake when I play. I tried out a bunch of gooseneck webcam holders and attached them to my piano, but they were also too short. The only problem was this Amazon Mic Stand (which was the tallest one I could find) still was a bit too short, so I put a couple boxes underneath the base to prop it up a bit higher. You may need a USB extension cable in this case. I used the AmazonBasics USB 3.0 extension cable.
This angle is great for explaining fingerings to a student, but also when I am explaining theory concepts (i.e. building major & minor chords, intervals). The other angle I use is my Macbook on the right side of the piano on a desk with a webcam attached. You could probably move the webcam around when needed for demonstration if you choose to skip the other angle I mentioned. I use Skype to switch between the camera angles when needed throughout the lesson (to do so, hold the camera button on the screen, select the camera you want and then click the checkmark).
Microphone
I use the Audio-Technica AT2020USB+ Microphone, which I set aside on a chair about a metre away. My studio room has a lot of resonance so my laptop would not be able to handle the amount of sound coming from my baby grand piano without any distortion especially being so close. This took a bit of testing to find out the proper distance for the microphone, and it will likely be different depending on your instrument and the space you are teaching in. Quality microphones can cost thousands of dollars, so I thought this was a reasonable solution for someone looking to get started and not trying to break the bank. If your laptop can handle the sound of your piano, you can skip this step.
When you log into Skype (or whatever platform you are using), don’t forget to go to Audio & Video Settings to switch over from the default camera/microphone to the ones you’ve attached. In case you run out of USB ports, or have some faulty ones (like me), you can always get an additional USB-Port, if needed. I use the Anker 4-Port USB 3.0.
Headphones
I use Audio-Technica ATH-M40X Professional Headphones. I previously used some old Audio-Technica headphones. I love these for personal use so I did not buy them just for this purpose. I was blessed to get my new pair this past Christmas! I love the audio quality for Audio-Technica headphones, but this part is obviously optional if you are just getting started. Any other pair of good headphones will work too!
In conclusion, there are many ways to customize your set up to suit your needs for online teaching. If you would like to simplify my set up and still benefit from two angles, consider using: your laptop with its built-in camera, and only 1 webcam on the tripod microphone stand. The mic stand is the least costly of all the equipment I listed. I was never super tech savvy, so don’t worry if technology is not your forte. Make sure you test everything out and before you know it, you’ll be able to teach online with ease. Best of luck to all the teachers out there adjusting to e-learning during this global health crisis, and stay healthy!
Recent Comments